

This is my write up of the Try Hack Me room Microsoft Windows Hardening. I am doing this room as a pre-req recommendation to the Recovering Active Directory Room, which I am thoroughly looking forwad to!
The rooms main focus is to run through the basics of workstation hardening and focuses on a variety of topics. Specifically :-
- Identity & access management
- Network management
- Application management
- Storage & Compute
- Importance of updating Windows
- Cheat sheet for hardening Windows
Shameless Copy paste there 🙂 if you are interested in doing this room, the link is here https://tryhackme.com/room/microsoftwindowshardening
Pre-reqs suggested for this room:-
- Windows Fundamentals 1 (Windows desktop, the NTFS file system, UAC, the Control Panel) https://tryhackme.com/room/windowsfundamentals1xbx
- Windows Fundamentals 2 (System Configuration, UAC Settings, Resource Monitoring, the Windows Registry)
- https://tryhackme.com/room/windowsfundamentals2x0x
- Windows Fundamentals 3 (Microsoft tools that help keep the device secure, such as Windows Updates, Windows Security, BitLocker) https://tryhackme.com/room/windowsfundamentals3xzx
Without further delay, lets get into it!
Task 1
Start the Machine…
Task 2
Ok so task 2 starts with an erroneous set of screenshots showing the user open services.msc from the run prompt. The actual image is the run prompt and then task manager.
In reality both ways can be used, but to achieve both results you would do the following.
Task Manager Approach
Now you could hit WinKey + R or go to start and Type run as this is a windows 10 system.
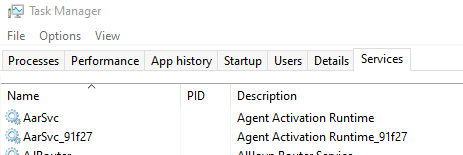
Once the run windows has opened enter taskmgr and hit OK (or whack enter).
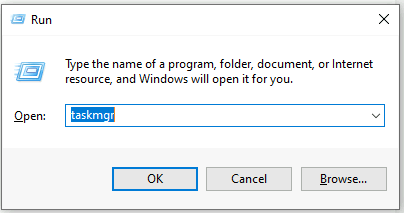
Task manager opens and you are free to click the Services Tab at the top of the task manager Window.
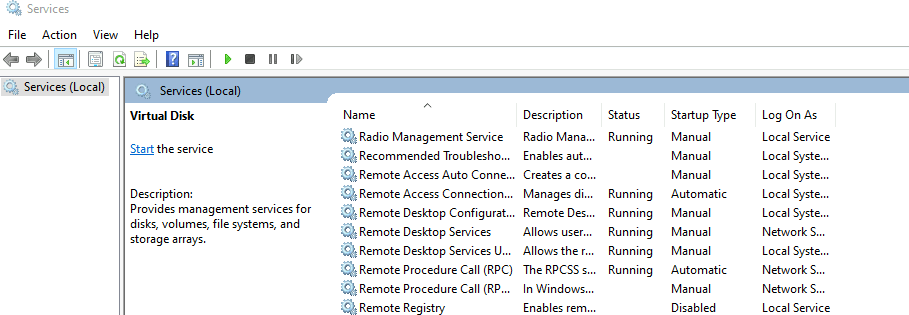
Services Approach
Following the same as above, popping open run, but now enter services instead.
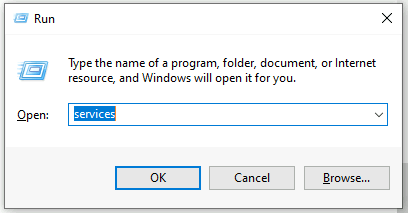
This is the actual result you would receive.
Other Approaches
Now if you want to start getting into this a bit more, looking at services and exporting them, well you have some additional options. Pop open PowerShell and try the commands and cmdlets as per below :-
- get-service | format-table -Autosize *** This Gets the running services and stops it from truncating by formatting it as a table, which is auto sized

That is all well and good but we can do better
try
- get-wmiobject -class win32_service
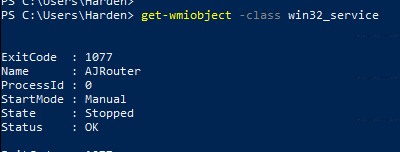
Again, that is great …. BUT WE CAN DO BETTER 😀
try
- Get-CimInstance -ClassName Win32_Service
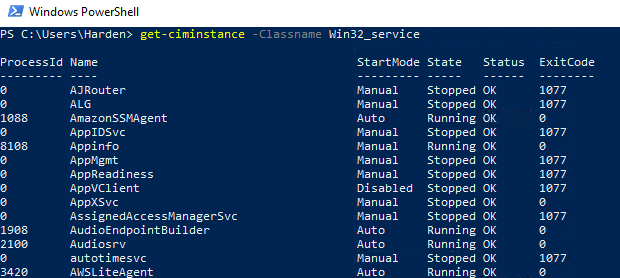
Now look at that, the only thing missing is the Display name, but we can go far with the executable, and we have processID’s too! This is going to be useful if we run netstat -naot 🙂 I’ll let you try it, but I believe the guidance will help here, netstat -naot and will tell us what connections are being made via TCP and the process ID (PROCESS. ID. :D)
After writing that last paragraph I wasn’t satisfied, I want you to see it all… SO
- Get-CimInstance -ClassName Win32_Service | Select-Object * | format-table -autosize
Yup, now you are in business!

Lets now take this one step further
Get-CimInstance -ClassName Win32_Service | Select-Object Name, DisplayName, State, StartMode, Status, ProcessId, PSComputerName | Format-table -Autosize

Lets Continue with the task,
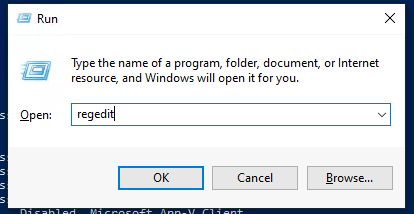
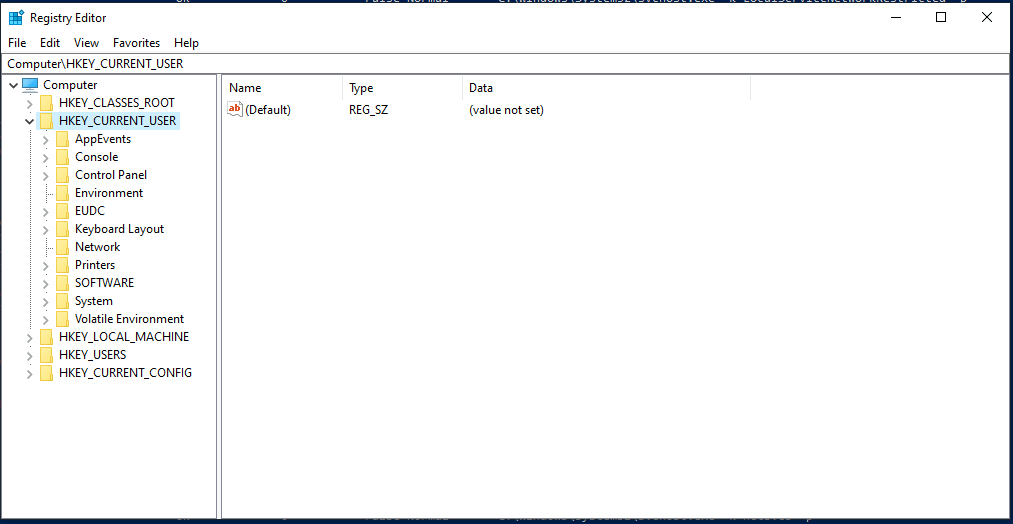
Next it asks you to investigate Regedit, so I will follow the path of start, type run, type Regedit in the run prompt
Accept the UAC prompt to elevate my privileges
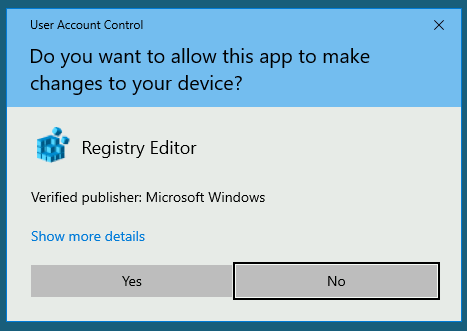
and Boom ! There it is 🙂
BUUUUUT We can do better 😀
SO
From Powershell
CD HKLM:
ls or dir
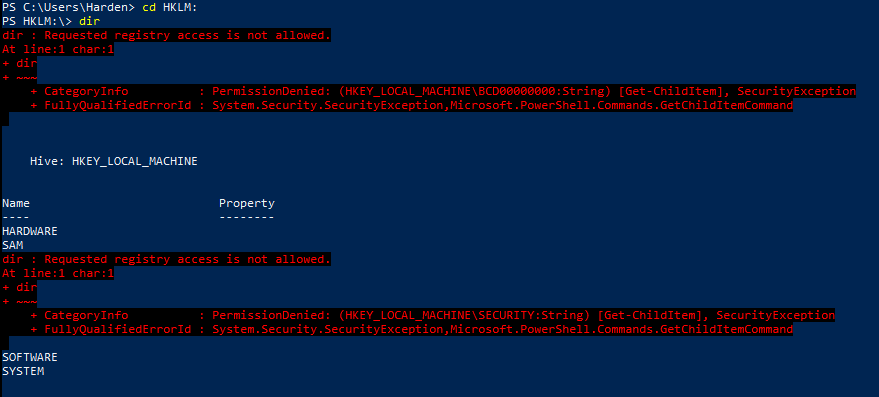
AH ! we need to be running PowerShell with the right Privileges… so run Powershell as Administrator.
do the same

Note that the SAM is not available still, this is because I wont have access or ownership of the key. That is for system processes to interact with… 🙂
You can now navigate the Registry like a directory structure from Powershell

You can also look to use get-childitem and a variety of other ways, but I want to get through this task now, so I’ll let you follow your nose on this.
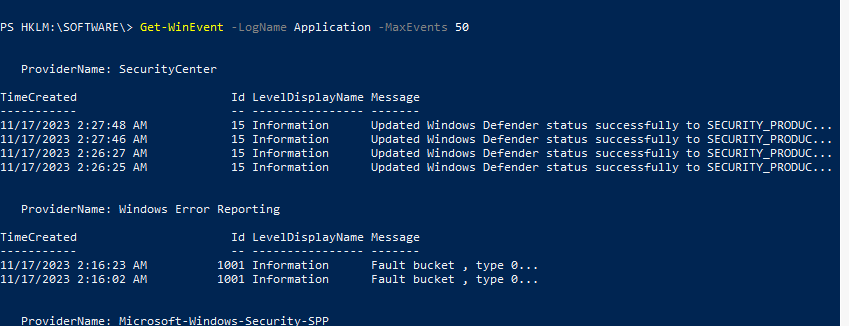
next the task asks us to open event viewer, so I run this from the run prompt, but equally I could use Get-WinEvent
from PowerShell I can use Get-WinEvent -LogName System (for System Log) and if you really want to get into it you can use the -filterXpath Argument or simply check the events with no other argument than limiting the events to a number (e.g. 50)
We learn from the task that windows telemetry service is likely running by default
- Get-CimInstance -ClassName Win32_Service | Where-Object {$_.Name -eq ‘DiagTrack’} | select-object * | Format-table -autosize

And now lets put together what we learned earlier with now
- Get-CimInstance -ClassName Win32_Service | Where-Object {$_.Name -eq ‘DiagTrack’} | Select-Object Name, DisplayName, State, StartMode, Status, ProcessId, PSComputerName | Format-table -Autosize

Yup Telemetry is there and yup it is running!
Task 2 Questions
Question 1: What is the Startup Type of App Readiness Service
- Change the where-object to DisplayName and the string to App Readiness
-

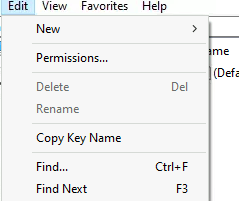
Question 2: Find the tryhackme key in the registry.
- Ok this one I may need to write a script for, so I am going to easy mode it for now. Pop open regedit and use the find feature.

Question 3: Find the Flag in %ProgramData%\Microsoft\Diagnosis
Navigate to the progrmadata folder, you can find this by get-childitem env:Programdata
The path is then presented

Now Navigate to the Directory
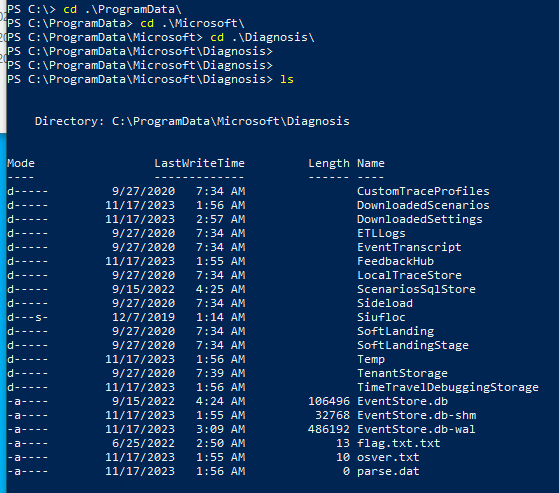
Flag.txt.txt looks interesting
Gc .\flag.txt.txt

Task 3
Wow, we made it, writeups take time, so I hope if you found this page you have found it useful so far.
In Task 3 we are lookin at IAM (Identity and Access Management)
Now I can talk alot about this subject, this very intergral and central security control to pretty much everything. The keys to your kingdom, the key card to your building. With out this a system is interactive without security or not a system at all (I’m looking at you IOT Devices).
Anyway, that said, lets get into it!
Arguably with the first line of this Task POLP (Principle of Least Privilege) should be considered. I like the example that Privilege includes actually having access to a system, this links to the authorisations mentions in this first sentence.
We can see that the authentication methods are focussed on, Passwords, PINS (for when you have a system and account linked to Microsoft, and you need to be able to logon locally… still a password), Windows Hello, Security keys (Yubikey for example) and other biometrics like finger print. You may have seen some if not all of these at some point.
We then get a description of UAC. Useful to know that this is based on detours (go check that out, or I’ll write something in future). Filters are used as part of this process (now I have mentioned that, check this, https://learn.microsoft.com/en-us/windows-hardware/drivers/ifs/allocated-altitudes, see if you can spot your AV provider in the list, if you ever wondered how it identifies or “knows” to scan a file).
Note UAC should always be ON, unless you have a good reason to change it’s capability. Typically this will come down to the risk analysis and whether the benefit outweighs the risk, or you have mitigating controls that rebalance the risk equation. Example, UAC is off, but the system is standalone, and isolated, and buried, and set in cement. 🙂
We also see that there is some investigation into the local systems security policies, specifically the conditions for logon attempts and password complexity.
So the task leans into UAC, Local Users, and Local Policy.
lets take a look at UAC from Powershell
- Get-ItemProperty “HKLM:\SOFTWARE\Microsoft\Windows\CurrentVersion\Policies\System” -Name EnableLUA

lets look at the current setting of UAC from PowerShell (I changed it for testing to NEVER (don’t… just don’t))
- PS C:\ProgramData\Microsoft\Diagnosis> $uacSettings = Get-ItemProperty “HKLM:\SOFTWARE\Microsoft\Windows\CurrentVersion\Policies\System” -Name EnableLUA, ConsentPromptBehaviorAdmin, PromptOnSecureDesktop
- PS C:\ProgramData\Microsoft\Diagnosis> $uacSettings | Select-Object EnableLUA, ConsentPromptBehaviorAdmin, PromptOnSecureDesktop

and I changed it back to Always

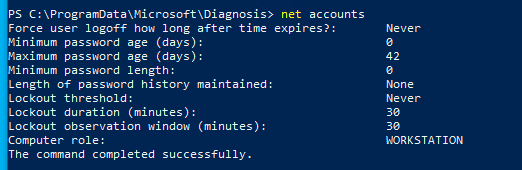
now lets check the policy for logon
net accounts
I use the net exe here as I wanted to keep it to the point, however you cna look to build a script to do this. A place to start is
- Get-CimInstance -ClassName Win32_UserAccount

Lets see who is a member of Administrators with
- Get-LocalGroupMember Administrators

Lets do the questions!
Question 1: Find the Admin account
Well if you followed above you got this!
- Get-LocalGroupMember Administrators
Question 2: What is the User friendly description for Always On mode in UAC
- You can write a script, or you can simply go to UAC and check what the slider level is set to.
Question 3: How many standard user accounts are there (i’ll be honest, this question tripped me up as, well you can see some… but)
- The question wants you to check via the UI for any accounts with standard user privileges
- Open Run, type control, and navigate to users. Look for Administrators and then look for Standard users, that’s how you get the answer. I would say that my initial thought was around builtin users, which is not the scope of the question, so I will take my lick for that).
Task 4
Focus on this section is :
- Firewalls
- Drivers
- Protocols
- Hosts and DNS
- ARP
- Privilege Management / Remote Access
The task opens with accessing the windows firewall using wf.msc, from here the Advanced Windows Firewall window opens.
It is worth noting how the Windows firewall works, and that it is quite effective as the perimeter control to the host. Basically, don’t turn it off, configure it… but not with an Any Any rule 🙂
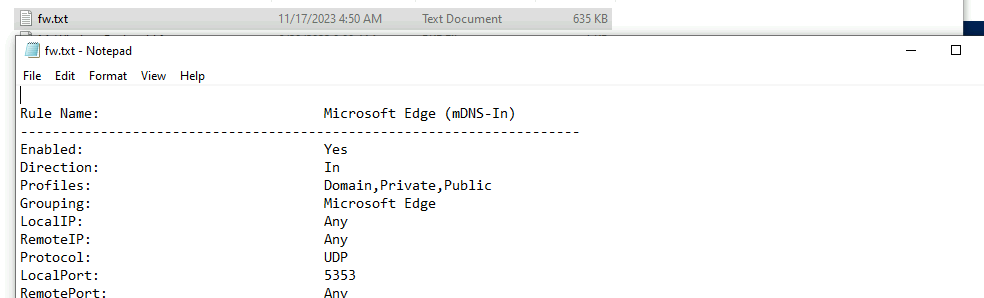
So the task wants you to check the windows firewall by the UI
This can be done by Powershell though using the netsh command
- netsh advfirewall firewall show rule name=all

This command will output the current windows firewall rules to the console, though you could send them to file or pipe them out.

We can also check the profiles and what is active with the following commands
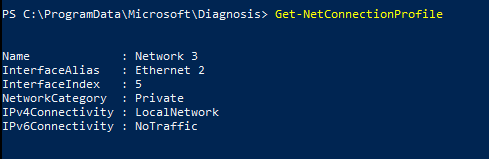
- Get-NetFirewallProfile
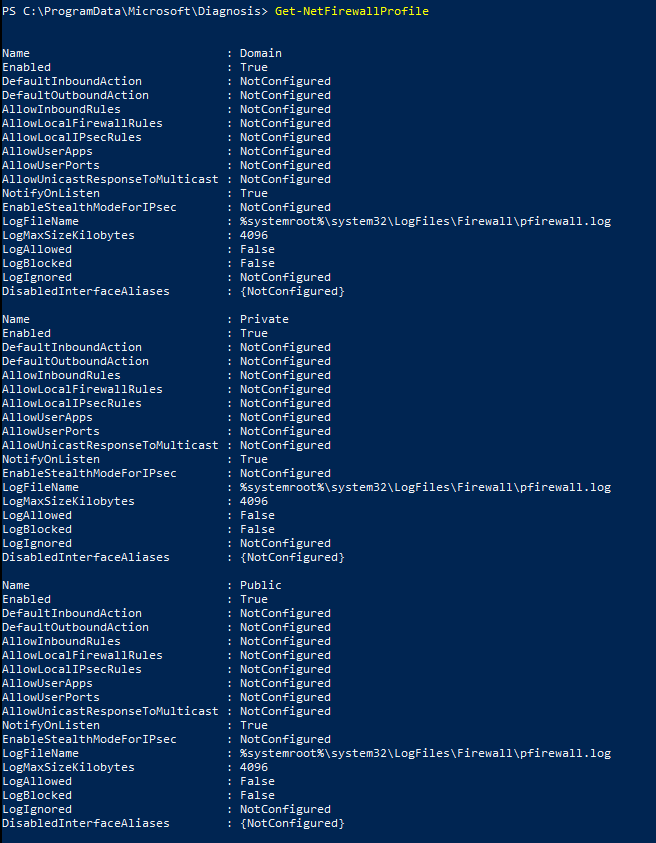
- Get-NetConnectionProfile
The task continues to discuss disabling devices that are not necessary.
We then look at protocols. In the example it is looking for SMBv1 and shows how to disable it:-
- Disable-WindowsOptionalFeature -Online -FeatureName SMB1Protocol

On servers we could check this with
- Get-WindowsFeature FS-SMB1
- Get-ItemPropertyValue -Path “HKLM:\SYSTEM\CurrentControlSet\Services\LanmanServer\Parameters” -Name “SMB1”
On Windows Clients
- Get-ItemPropertyValue -Path “HKLM:\SYSTEM\CurrentControlSet\Services\mrxsmb10” -Name “Start”
- (if not installed or setup expect an errrrrrr)
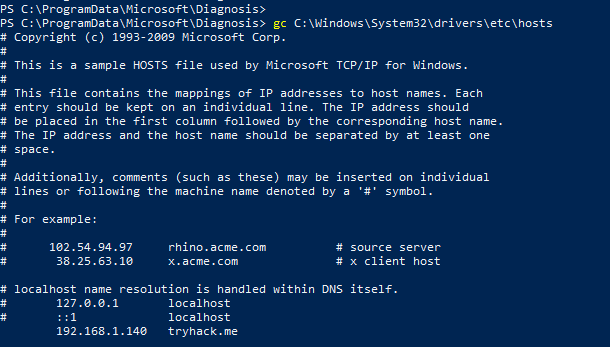
Next we look at the hosts file, (the ultimate source of DNS query truth… at least for your system). Assuming you still have Powershell open with Administrator Privileges you can run the following to check it.
- gc C:\Windows\System32\drivers\etc\hosts
Finally we look at the ARP Cache and turning off Remote Desktop.
Disabling Remote Desktop does not necessarily mean you are not listening on 3389! keep that in mind.
Question 1: Which Firewall Profile is active?
- The Categroy is a big clue
- Get-NetConnectionProfile
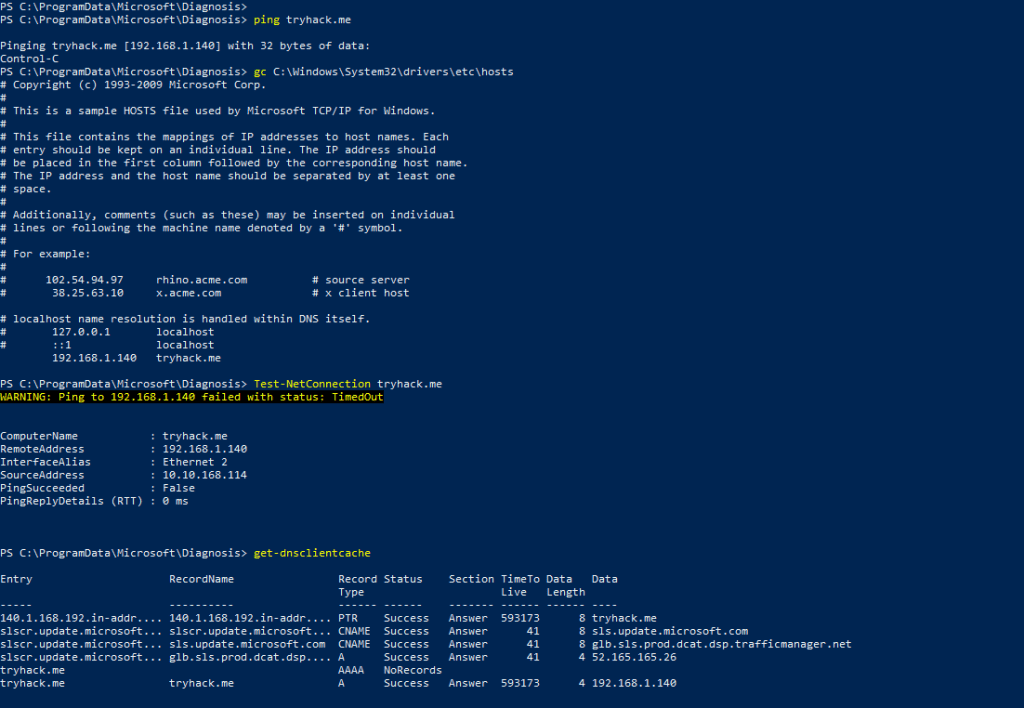
Question 2: Resolve tryhack.me
A few of ways you could do this :-
- ping tryhack.me
- gc C:\Windows\System32\drivers\etc\hosts
- test-netconnection tryhack.me
- get-dnsclientcache (need to have tried to resolve first)
Question 3: Run arp -a and identify the MAC or Physical address for 255.255.255.255
- Do it
- run arp -a
- Do it better.
- arp -a | findstr 255.255.255.255
- DO IT BETTER !
- Get-NetNeighbor -AddressFamily IPv4 | Where-Object { $_.IPAddress -eq ‘255.255.255.255’ }
Lets also Quickly look at just the cmdlet Get-NetNeighbor

Cool, eh!
Task 5
In this task we look at App Control. Typically we decide now what can be installed and what the source of the application. In the example Apps can only be installed via the Microsoft Store. Trusted sources for applications is a good way to avoid applications that are not wanted on your systems or systems in the environment. However they are relying solely on the trusted source being … well, Trusted!
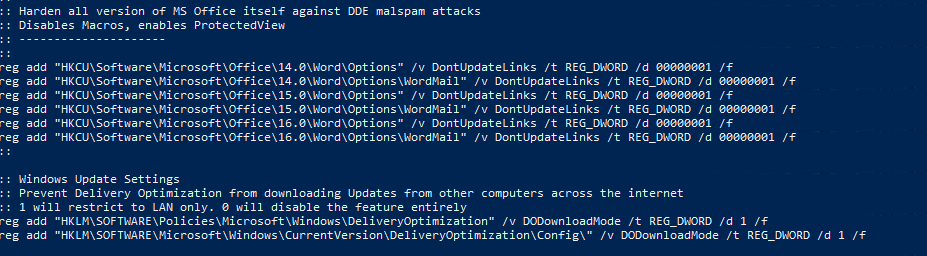
There is an interesting script that the exercise highlights, to do with hardening office. Lets have a look at this.
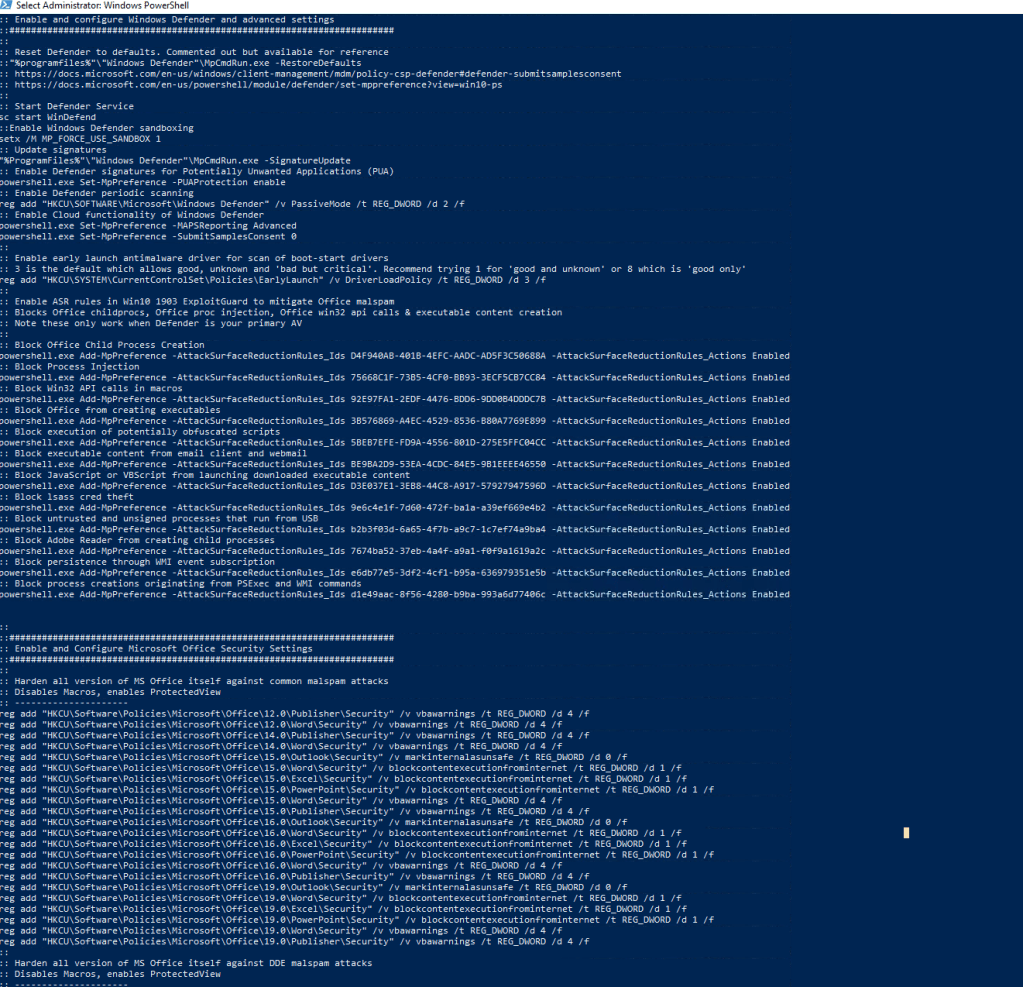
Looking at the script we can see windows defender is being started.
- There are block Child process rules being added (applocker?)
- And there are registry setting being set to avoid execution of content identified in the meta data as “From the internet”
- Additionally further link updates are disabled along with Macros.
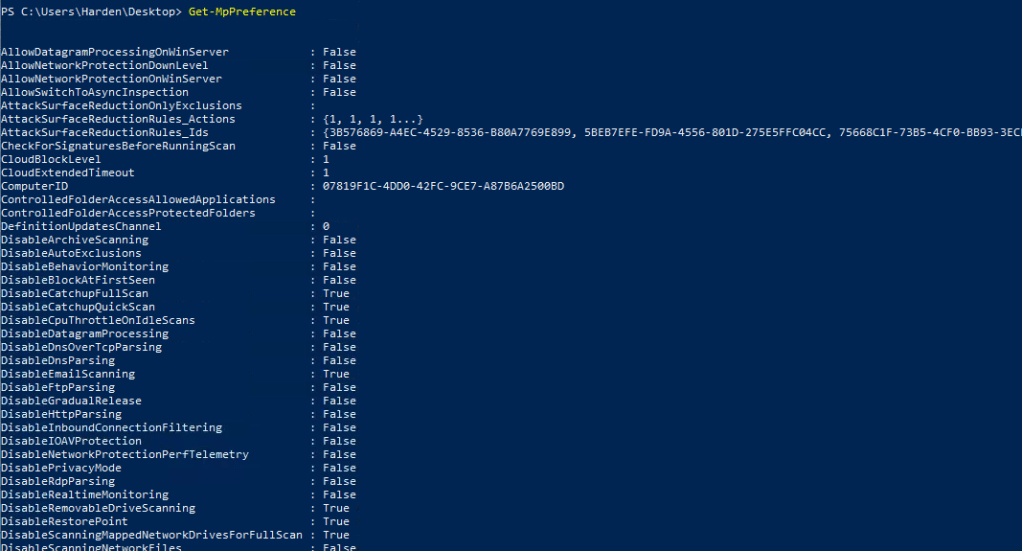
In addition to this the task is looking at Windows Defender AntiVirus, you cna check this with
- Get-MpPreference
Question 1: What are the Windows Defender AV Exclusions?
- Get-MpPreference | Select-Object -Property ExclusionExtension, ExclusionPath, ExclusionProcess

Questions 2: Should you use a random file ?
Who doesn’t love an unsolicited word doc in a e-mail. It might be telling you about your long lost relative who needs to deposit a ton of cash to your bank… or you know don’t do that.
To be fair, even if you get something from someone you know, if it wasn’t solicited, well think twice at least. Does it make sense that they are sending you a file. If there is some kind of urgency around the file, call the person, or someone close to them to verify. Great listen on Spotify, Darknet Diaries, https://open.spotify.com/episode/713pVuBWvjlTmeywJF88rA?si=5a86da65555f461f Mimics of Punjab.
Question 3: Run the Bat file and get the flag!
Unless you have been curious about the script, you can get it this way.
Task 6
This Task is focused on Storage. Specifically
- Bitlocker
- SandBox
- Secure boot
- File Backups
In this lab Bitlocker cannot be enabled, however lets talk about the process. Typically when configuring bitlocker, it will ask you to set up a pin. This pin you will need in future, when your system starts from a hibernating or From cold boot or restart, the drive needs to be decrypted (“decrypted” more like the key is placed into memory). Now this process typically needs a TPM, though you could configure windows to do this without a TPM (not really a good idea, but you can read how to do it). The Pin is to access the TPM. (Trusted Platform Module).
As part of this process a recovery code needs to be created. This can be saved to a file, a .txt file specifically. You shouldn’t keep this on your system. You should ideally store this out of band, out of digital if possible. and somewhere secure.
Sandboxing doesn’t work in this lab, and I haven’t tried it myself yet, however the configuration for this is in the Task.
Click Start > Search for ‘Windows Features’ and turn it on > Select Sandbox > Click OK to restart
Sandboxing allows you to run an application in a sandbox, reducing the risk of malicious applications running directly on the host system.
to enable this straight from the powershell CLI you can issue the following command:- (Pre-reqs do apply!)
- Enable-WindowsOptionalFeature -Online -FeatureName “Containers-DisposableClientVM” -All
Question 1: Last 6 Digits of the Recovery Key
- Default location for file creation …. C:\users\<user>\documents\
- The File is there
Question 2: the number of character that make up the Recovery Key
- Count ’em up if you need
Question 3: Check the File extension
- It’s on the desktop, and file extensions are not hidden.
Task 7
Windows Update
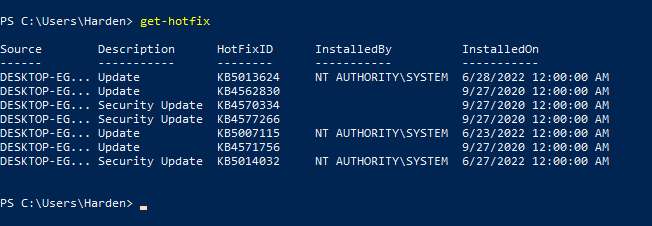
Keeping your system up to date is important, you are able to avoid issues with bug fixes.
Check what is installed with
- Get-Hotfix
Question 1: Check the CVE Score for CVE-2022-32230
- Google it, also CVE v2 not CVE v3
 …
… - https://nvd.nist.gov/vuln/detail/CVE-2022-32230
Last but not least
Task 8
It’s a cheat sheet to Download!
I hope you enjoyed this Article! I had a great time writing it brushing up some PowerShell and helping you understand how to be more secure 🙂 Have a great Day.
